In this modern era, where everything is linked with video and graphical content, there are a variety of reasons you should opt for your easiness of tasks. So, whether it’s to record a live stream or create a video training for work, record your tutor’s presentation or perform any product demonstration, in any case, you need to record your computer screen and audio together which you can say is the utmost need of this time.
When you want a screen recorder with a sound that can truly deliver amazing features for free, well, let’s just say that your options are the tip of the iceberg. With that being said, here in this guide, we’re going to break down the best option for you being a beginner you can opt right away as it’s available for free in the market. The functionalities must include top-notch features to fulfill your modern needs of the video-related queries and essentialities.
An Easy Way to Record Screen and Audio
Here’s the kicker for you as we’re introducing Wondershare DemoCreator to fill the space in the mess of the internet. This powerful yet user-friendly software, DemoCreator may be the best screen and audio recorder for Windows and macOS you’ve known so far. It has built-in support for pro-level recording as well as editing needs. To the extent, you name the feature and DemoCreator would include in its package. All you need to know now is understand the how-to functionality of this toolkit and for that purpose, we’re here enlisting all the steps you should know before you kickstart with this software.
Steps to Use DemoCreator
Here we go, in this section, we’re emphasizing the step-by-step guide to get a hands-on experience of this all-in-one screen recorder and video editor application. Follow these steps to learn more.
Step1: Download and Install DemoCreator For Windows or macOSThe foremost step, you need to perform now is downloading this advanced-level application for your specified OS. You can go to DemoCreator official website to download it hassle-free.
After the downloading of DemoCreator application for Free, you need to install it inside your system so you can better start using it right away. Simply follow the default installation guide to get this software inside your system.

Step2: Configure Audio Recording Settings
Inside the DemoCreator starting interface, you can opt for the New Recording button and here you go straight to the DemoCreator recorder where you can record your computer screen and the sound from both of your audio sources- the attached microphone and your system audio. You can use the computer screen recorder to customize your recording setting accordingly.

Step 3: Real-time Screen Drawing When Recording
Now in the next step, you can kickstart the recording after full customization of your own choice. Just enable the Screen Drawing slider and hit the Recording button to kickstart the recording.

Inside the recording window, you can select the screen region and utilize the Screen Drawing menu bar that will help you to record more effectively than ever.
Step 4: Stop the Recording
After you’re done with the recording, now is the time to stop and save it accordingly. Now If you’re performing a screen recording for an assignment of student’s homework or any other kind of work that doesn’t require any modification inside the content or needs editing then you can effectively perform the Fast Export inside the video editor that will save and export your recorded content to your desired location and format with just a single hit as below:

How to Edit Your Video and Audio with DemoCreator
After performing the effective recording of your screen with audio, now is the time to polish your recorded content with the built-in video editor of DemoCreator and for that, you can simply head towards the video editor without any hassle and follow the steps below:
- Basic Editing and Filtering:
When first time you end up recording. You will enter into the editing interface. You will find the screen recording and Audio track you record with the Microphone is on a different track. Then you can set Audio Fade in /out by dragging the audio part of your recorded content as shown below.

- Audio Editor:
Apart from audio fade in and fade out setting, you can also set audio volume, denoise your video, alter your audio speed. For any editing to the content, you can refer to this editor at the right side of the interface of DemoCreator editor as shown below:

- Video Editor:
Here’s the kicker with the advanced-level video editing tool utilization as you can also add some effects like annotation, Caption, and others to make an entire explain the video.
For captions or any highlights of your recorded content, you can refer to the captions menu bar as shown below:

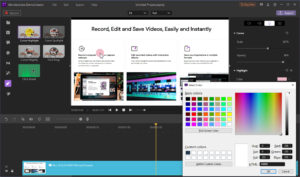
You can also include a variety of effects to your content and for that, hit the Effects menu as shown below:

In addition to that, you can also perform the Cursor effects by referring to the Cursor effects menu as shown below:
- Export/Share Your Content:
Lastly, you can hit the Export button as shown below and customize your output file to your desired customizations suitable for you. You can give the specified format as well as the codecs setting to your recorded video content with straightforward exporting options shown below:

In addition to that, you can also share your content directly to your YouTube channel by hitting the YouTube menu bar from this window and be with it.

In a Nutshell
So far, Wondershare DemoCreator software has the top place to help you doing ease of tasks to the utmost extent. As being a hectic routine, you can’t spare your time to learn the advanced-level tool complex tools available in the market. For that easiness, Wondershare DemoCreator is the best choice with the all-in-one ability to perform your favorite actions to your recorded content in real-time as well as in post-production tenure. So, we recommend trying it out now for free.